

Many newer homes have a fresh air system near the furnace called an HRV or ERV. If yours does, now is the time to make sure it is running. When the cold weather settles in, a ventilation system that has been ignored all summer can quietly lead to wet windows, frost in the attic, and mold. The good news: most of the upkeep takes about 20 minutes, a vacuum, and a little warm water. No tools or HVAC background required.
This guide covers HRV and ERV maintenance in plain language: what these systems do, how an HRV differs from an ERV, the problems we find most often during inspections in the Fargo-Moorhead area, and a simple step-by-step routine any homeowner can follow.
What is an HRV or ERV, and why does my house have one?
An HRV or ERV is a fresh air system. It pulls stale, moist air out of your home and brings fresh outdoor air in, all day, every day. As the two air streams pass each other inside the unit, the outgoing warm air heats up the incoming cold air, so you get fresh air without throwing away your heat.
You are most likely to find one in homes built in roughly the last 15 to 20 years. Newer homes are built very tight to save energy. That is great for your heating bill, but it also means the moisture from showers, cooking, laundry, and simply breathing has nowhere to go. In older, leakier homes that moisture escaped through gaps around windows, doors, and the attic. In a tight home, the HRV or ERV does that job on purpose.
When it works, it does two important things:
- Better indoor air. It flushes out cooking odors, stuffy air, and indoor pollutants, and brings in fresh air.
- Less winter condensation. It keeps indoor humidity in check, so moisture does not collect on cold windows, inside exterior walls, or in the attic.
How to tell if you have one: Look near your furnace or in the mechanical room for a metal box, often about the size of a suitcase, with four round ducts coming out of it. Two of those ducts run to the outside of the house, where you will see two hooded vents on the siding. Many homes also have a small wall control, sometimes labeled with a fan symbol or “humidity,” in a hallway or near the thermostat.


HRV vs. ERV: what is the difference?
Both systems swap stale indoor air for fresh outdoor air and save heat while doing it. The difference is what happens to the moisture.
- HRV (Heat Recovery Ventilator) moves heat from the outgoing air to the incoming air, but it sends the moisture outside. In winter, that makes it a good tool for drying out a house that runs too humid.
- ERV (Energy Recovery Ventilator) moves heat and some moisture. It keeps part of the indoor humidity inside in winter, and in summer it keeps some of the outdoor humidity out.
| HRV | ERV | |
|---|---|---|
| Brings in fresh air | Yes | Yes |
| Saves heat | Yes | Yes |
| Removes indoor moisture in winter | Yes, more | Some, less |
| Common in | Cold climates and homes that run humid | Homes that run dry in winter or muggy in summer |
| Core cleaning | Usually rinse with water | Usually vacuum only; many cores must not get wet |
Which one is better? Neither. It depends on the house and the family living in it. In our cold winters, HRVs are very common because most tight homes need help getting rid of moisture. ERVs show up in homes that tend to feel dry in winter. If you are not sure which one you have, look at the label on the unit or the owner’s manual. The model name usually says HRV or ERV, and the core cleaning instructions are different for each.
What we find during inspections
The most common HRV and ERV problem we see is not a broken unit. It is a unit that has not been maintained. Builders and HVAC contractors install them, but rarely show the homeowner how to run or care for them. Because these systems are fairly new to most households, many people do not know they have one, let alone that it needs cleaning. Here is what we find most often:
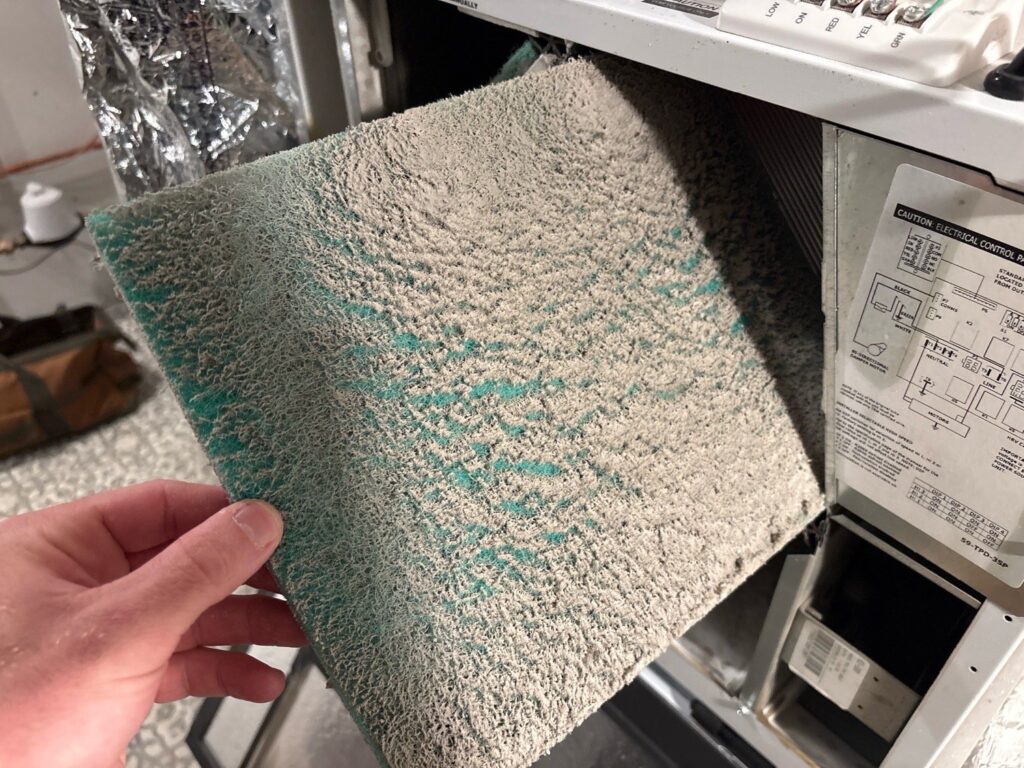
- Completely clogged filters. The filters are buried in dust and lint, so very little air moves. The unit runs, but it barely does its job.
- Blocked exterior hoods. The two vents on the outside of the house get plugged with leaves, cottonwood fluff, spider webs, lint, snow, or frost. If fresh air cannot get in, the system cannot work.
- Critters in the ducts. The small screens on the outside hoods fall off or rust through. Birds, mice, and insects move in and build nests inside the ductwork.
- Wrong control settings. The unit is turned off, set to the lowest speed, or the humidistat (the humidity control) is set wrong. Sometimes it was shut off because it felt drafty or noisy and never turned back on.
- Clogged condensate drain. Many units have a small drain hose that carries water away. If it is kinked or plugged, water can back up and spill out of the unit.
- Disconnected or damaged ducts. Ducts that are loose, crushed, or missing insulation can drip water or leak air in the basement or attic.

Wet windows, attic frost and mold: what happens when it sits idle
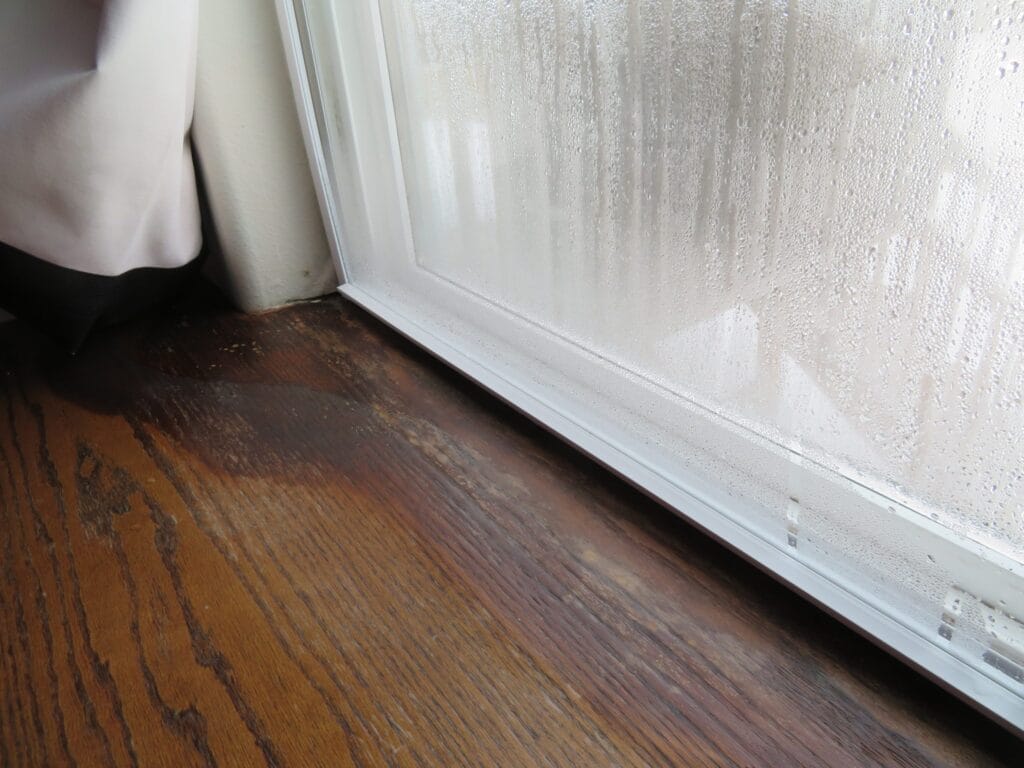
Warm air holds a lot of moisture. When that warm, moist indoor air touches a cold surface, the moisture turns into water, just like a cold glass of water “sweats” on a summer day. In a Fargo-Moorhead winter, there are cold surfaces everywhere: windows, outside corners of rooms, closets on exterior walls, and the underside of the roof.
If your HRV or ERV is not running, the moisture from everyday living builds up with nowhere to go. That leads to:
- Water and ice on the inside of windows, which can damage sills and trim
- Mold on window frames, in closets, and on the cold corners of exterior walls
- Frost buildup on the roof sheathing and nails in the attic, which melts and drips when it warms up
- Musty smells and stuffy air
The goal is to have the system clean and running before the first deep cold snap. Once frost and mold get started, they are harder and more expensive to fix than a filter cleaning. For more on why windows sweat, see Lars Knows Condensation.
Step-by-step: the beginner’s maintenance routine
Set aside about 30 minutes, plus drying time. Here is what you need:
- A vacuum with a brush attachment
- A bathtub or laundry sink and mild dish soap
- A towel and a flashlight
- Your owner’s manual, if you can find it (often taped to the unit, or online by searching the model number)
Step 1: Turn it off and unplug it
Turn the unit off at the wall control, then unplug it at the unit. Many units shut off on their own when the door opens, but unplugging is the safe habit.
Step 2: Open the door
Most units have two latches on the front. Swing the door open and you will see the filters and the core, a large square block in the middle.

Step 3: Clean the filters
Slide the filters out. Most are washable: vacuum off the loose dust, wash them in warm, soapy water, rinse, and let them dry completely. If yours are disposable, replace them. Write down the size so next time is easier.
Step 4: Clean the core
Slide the core out gently by its handle or strap. Check the label or manual first, because HRV and ERV cores are cleaned differently:
- Most HRV cores: soak and rinse in warm water with mild soap, then let dry completely.
- Most ERV cores: vacuum gently with a brush attachment only. Do not get them wet unless the manual says it is safe.
Step 5: Wipe out the inside
Vacuum dust and lint from inside the cabinet and wipe it down with a damp cloth.
Step 6: Check the drain
If your unit has a drain pan and hose, pour a cup of water into the pan and make sure it drains freely. The hose should have no kinks and should run downhill to a floor drain or sump.
Step 7: Check both hoods outside
Find the two vents on the outside wall and clear out leaves, lint, webs, snow or nests. Make sure the screen is still in place. If it is missing, have an HVAC contractor replace it with the correct screen. Very fine mesh plugs easily and frosts over in winter, so avoid it.
Step 8: Put it back together
Once everything is completely dry, slide the core and filters back in the same direction they came out (look for arrows). Close the door, plug the unit in and turn it back on.
Step 9: Make sure it is running
Listen for the fans, and hold a tissue near an indoor grille to feel air moving. Outside, you should feel a gentle airflow at the exhaust hood.
One thing to leave alone: the balancing dampers in the ducts near the unit. The installer sets these to keep incoming and outgoing air even. If you think the airflow is off, call an HVAC contractor.
Setting the controls for winter
A clean unit only helps if it is turned on and set correctly. Controls vary by brand, but most have the same basic settings:
- Off. Do not leave it here in winter.
- Intermittent (or 20/40). Runs about 20 minutes every hour. A fine choice for many homes.
- Low or continuous. Runs all the time on low speed. A good winter default for most tight homes.
- High. Used to clear out moisture fast, for example after showers or cooking.
- Recirculate. Moves air around inside the house but does not bring in fresh air. Do not leave it here as your normal setting.
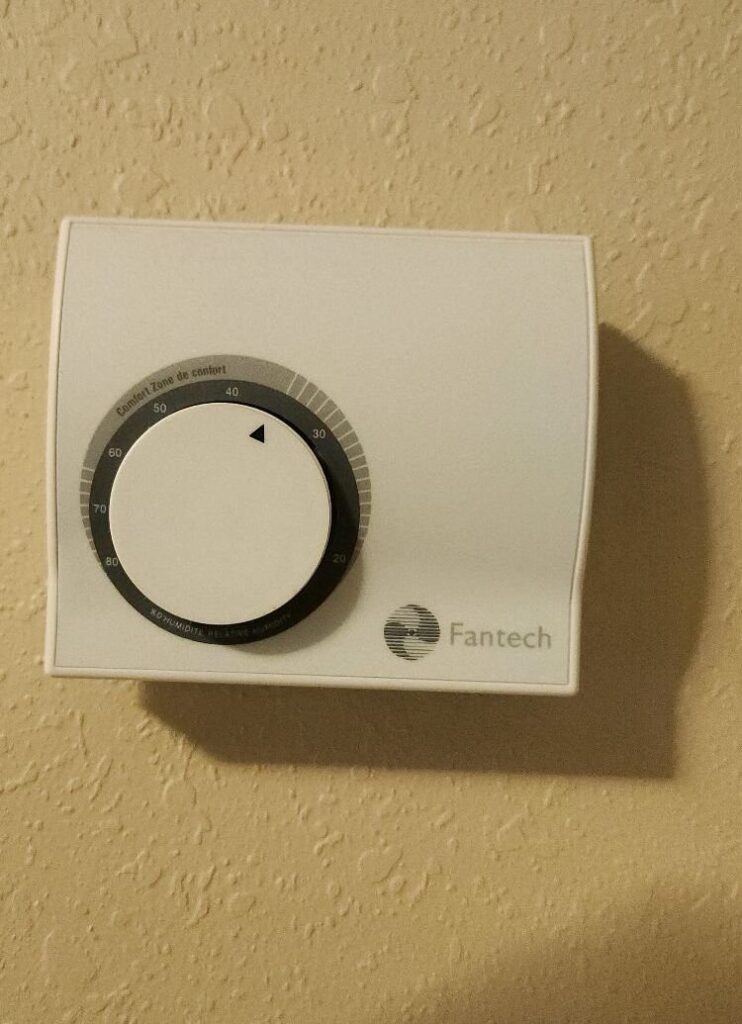
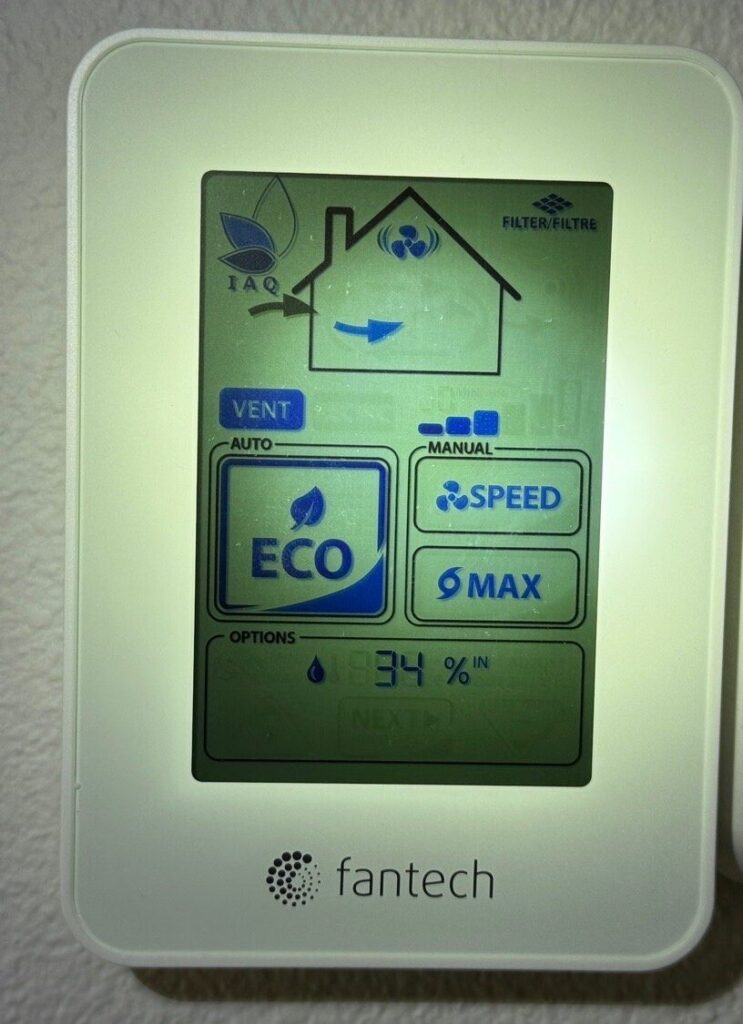
Wall controls look different from home to home, but they do the same job. If yours has no labels, search the brand and model online for the manual.
Many controls also have a dehumidistat (often just labeled humidity or with a water drop symbol). It tells the unit to switch to high speed when indoor humidity goes above the number you set. In winter, set it based on the outdoor temperature. The colder it gets outside, the lower your indoor humidity needs to be to keep windows dry:
| Outdoor temperature | Target indoor humidity |
|---|---|
| Above 40°F | 45% or less |
| 20°F to 40°F | 40% or less |
| 10°F to 20°F | 35% or less |
| 0°F to 10°F | 30% or less |
| -10°F to 0°F | 25% or less |
| -20°F to -10°F | 20% or less |
| Below -20°F | 15% or less |
Simple rule: if you see water or frost on the inside of your windows, your humidity is too high. Turn the dehumidistat setting down or run the unit at a higher speed. If the house feels too dry (static shocks, dry skin, dry throat), turn the setting up a little.
A few more tips:
- A small digital humidity gauge (hygrometer) costs about $10 to $20 and takes the guesswork out of it.
- If your furnace has a humidifier, turn it down or off on very cold days. It should not fight against your HRV.
- Some homes have boost timers or buttons in the bathrooms. Use them during and after showers.
Easy maintenance schedule
Put these on your calendar and the system will take care of you.
Every month during winter
- Check both exterior hoods for snow, frost, or ice buildup and clear them
- Look at your windows in the morning for condensation and adjust the controls if needed
Every 3 months
- Clean or replace the filters
- Check the exterior hoods and screens
Once or twice a year (spring and fall)
- Clean the core
- Vacuum and wipe out the inside of the unit
- Test the condensate drain
- Set the controls for the season
Every few years
- Have an HVAC contractor check airflow, balance, motors, and ductwork
When to call a professional
Most of this is homeowner-friendly, but call an HVAC contractor if:
- The unit does not turn on, or the fans are loud, grinding, or squealing
- Water is leaking from the unit or dripping from ducts
- You find a nest or animals inside the ductwork
- An exterior screen or hood is missing or damaged
- Your windows still sweat after cleaning the unit and adjusting the controls
Not sure where to start? Let us help you get ready for winter
If you have an HRV or ERV and are not sure it is working, or you are not sure whether you have one at all, our Nordic Fall Home Checkup is a great place to start. One of our inspectors will walk through your home before the cold sets in, point out what needs attention, and answer your questions about getting your house ready for winter. Ask your inspector to show you where your unit is and how to set it.
The Fall Home Checkup starts at $295 for homes under 3,000 square feet in the Fargo-Moorhead area. Book your Fall Home Checkup or call us at 701-566-1446. A little attention now can save you from wet windows, frost in the attic, and mold this winter.